|
By far the question I am asked most about our Barnwood Builders episode from April 2016, (Season 3 episode 7) is "how did the glass walls over the logs work out?" Well, they have been up and in use for over a year now with no sign of moisture, rot, mold or mildew. We did a lot of preparation and prevention before we actually put the glass up. We carefully cleaned the log walls using a nylon brush and leveled a few spots that would have caused unusually large gaps behind the glass. 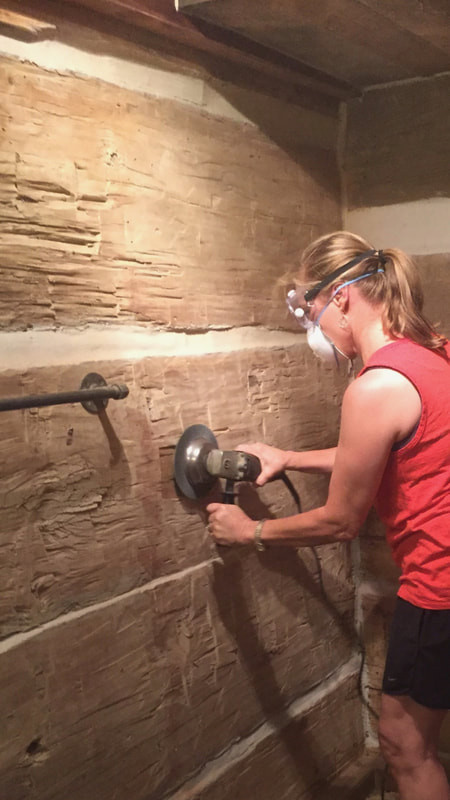 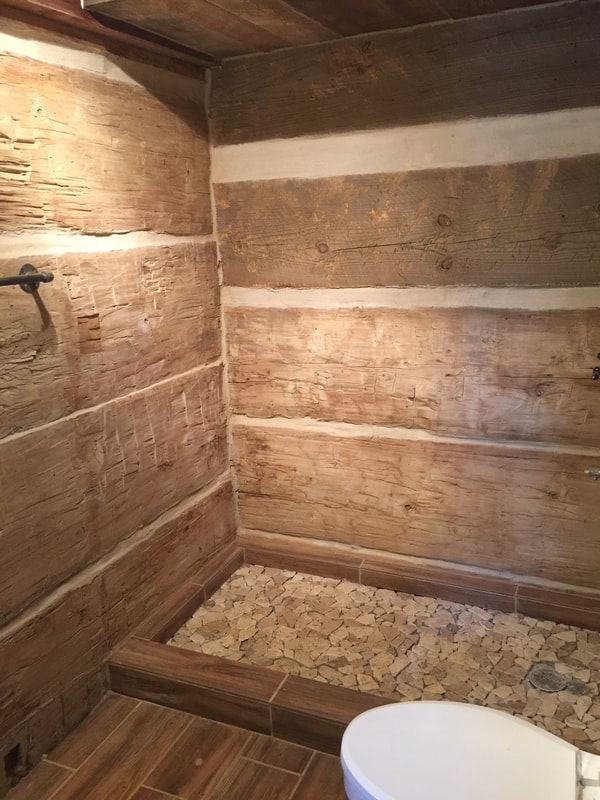 The next step was to wipe all the logs down and carefully vacuum the logs and the chinking joints to remove all the dust from the sanding.  Next we brushed on several coats of a waterproof poly sealer. As you can see, the sealer deepens the color of the logs a lot, so much that we sealed the logs in the entire bathroom. The sealer also called wall a lot of attention to the fact that there were 2 replacement logs on the outside We tried to age and distress the logs put in place by the previous owner but the replacement logs were pine and the originals are all poplar so getting them to match was an impossibility. *Please note, we do not normally seal the interior of our logs with such heavy duty sealer because it so drastically changes the color and I LOVE the aged patina that the old logs have and I try to always preserve that when possible. But for this application, the moisture barrier for the logs was my primary concern. 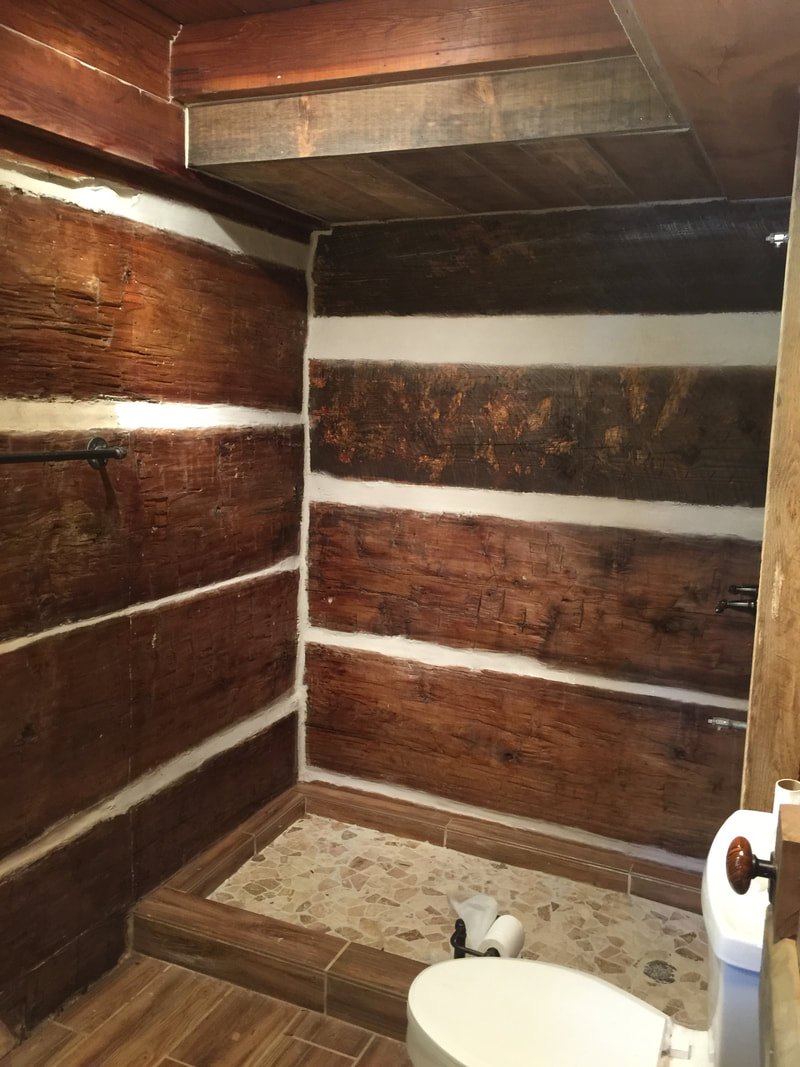 All ready for the glass! 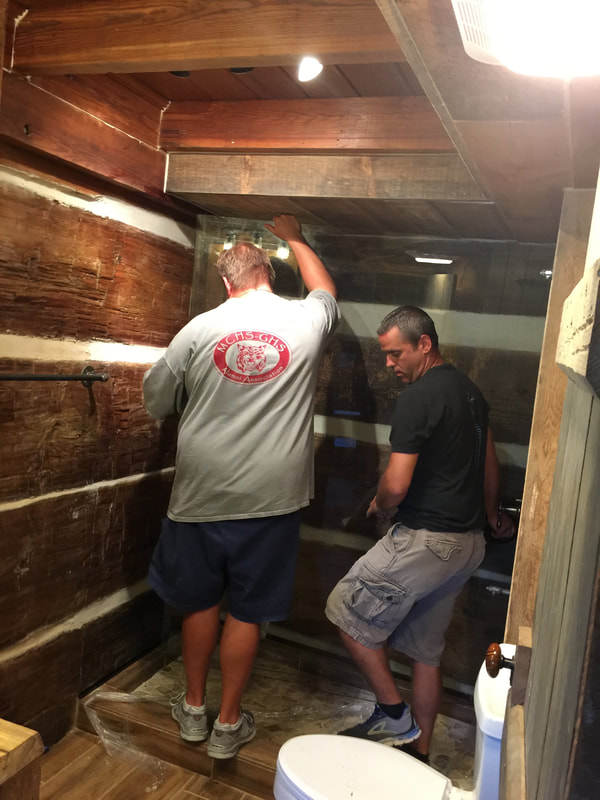 Oil rubbed bronze U channels were used to hold the glass in place and are mounted on the floor and the ceiling about one half an inch off of the logs on the back wall and the left hand end wall of our shower. This half inch gives the logs an air gap to release any moisture or humidity that might build up behind the glass. Our glass installers carefully lift the heavy glass shower walls into place and insert the panels into the channels on the top and bottom and secure each panel into place. 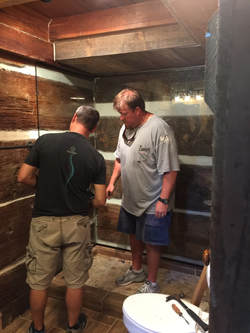 After the panels were secured, the bottoms of each panel and the corners where the glass met and where the glass met the tile on the front wall were thoroughly caulked with clear silicone to prevent any water from seeping under the glass or into the corners. 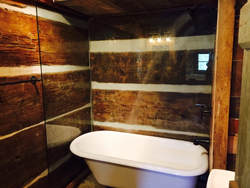 I am not usually afraid to try new things and think outside the box, but because of the potential risk to my logs, I did approach this project with a little more trepidation than most of the ideas I carry out. But I was actually so thrilled with the way the first shower turned out that I did a second glass log wall in another bathroom:) I definitely give this project a 2 Thumbs Up!! 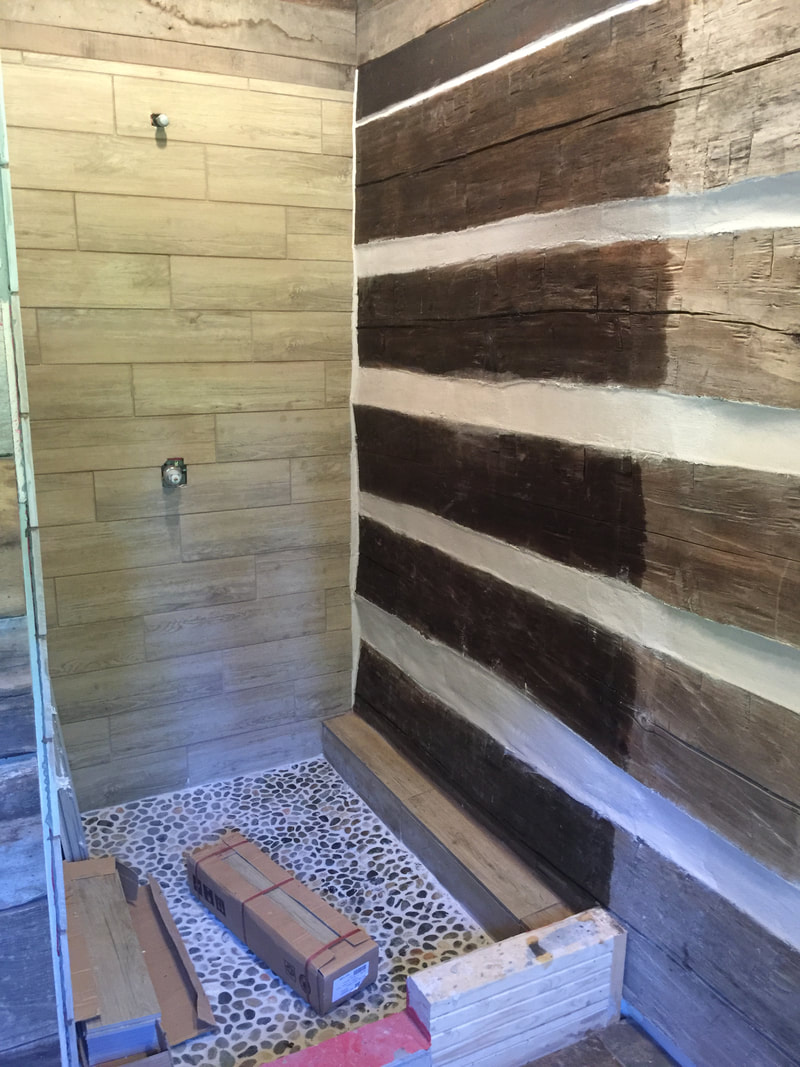 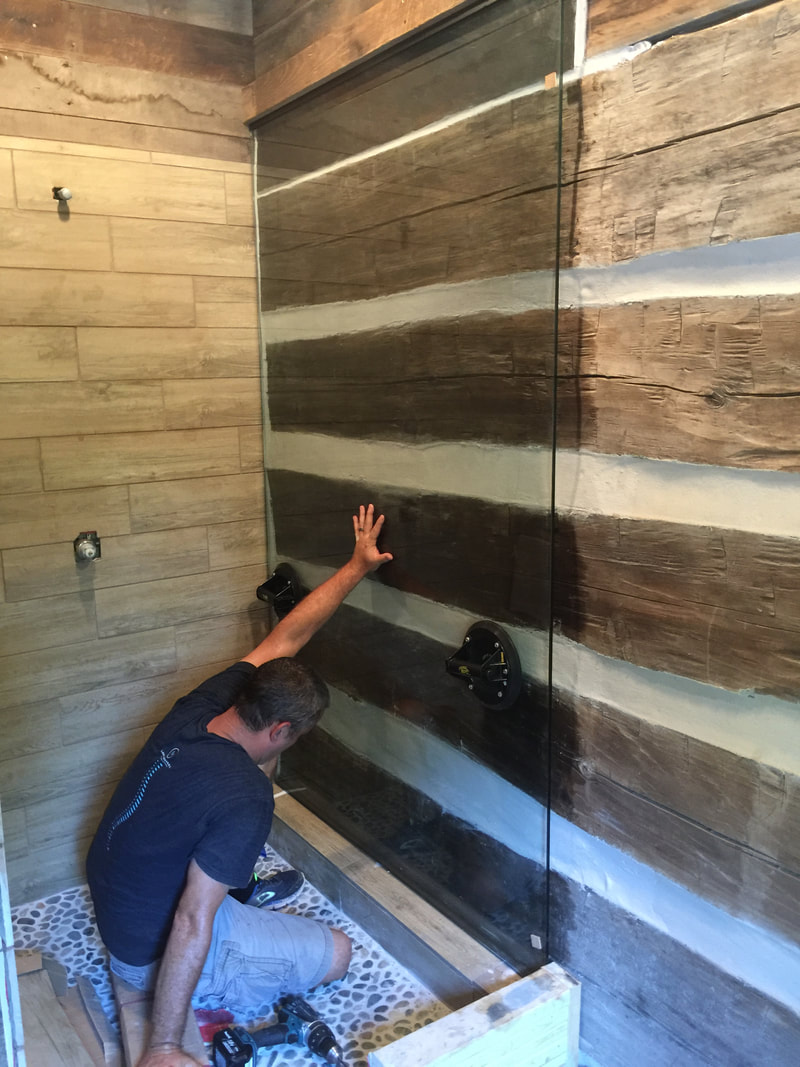 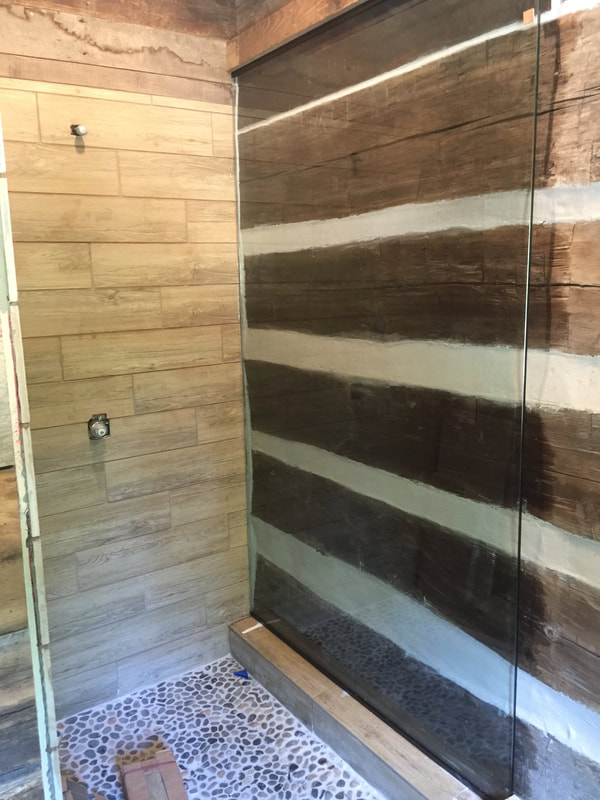 If you want to see more of Barnwood Lodge finished, check out our virtual 3D video tour on the Barnwood Lodge page here on our website AND tune in to the upcoming season 6 of Barnwood Builders......ssshhhh;-)
0 Comments
|
About Me:
Hey Y'all! 
Archives
April 2022
|
 RSS Feed
Rest Relax Restore